Installing from CD
The sipXecs Single CD Install image automates the installation of both the Linux operating system as well as the sipXecs application. For RPM installation go to Installing on Fedora and CentOS.
Requirements
Hardware
The Installation CD is made for standard Intel / AMD based systems (P4, Core Duo or equivalent) with a minimum of 1.5GB of RAM (more is recommended). It is not made for VIA CPUs (C3 or C7). For more detailed recommendations, see Hardware Requirements.
If the installer does not recognize your disk, you may be able to install by selecting the 'manual format' option.
Operating System
The single install CD currently is based on CentOS6 / 64 bit. There is also a 32 bit ISO available, but be aware that the 64 bit version is more extensively tested - using it would be the more conservative choice.
Obtaining and Burning the Installation CD Image
- Stable Release: Download the CD from
Stable and beta releases
- Development CD builds: Development builds are available for those who are impatient or wish to contribute testing to the project; note that development builds might not work at all. You have been warned! The development builds are here.
The downloaded ISO image needs to be written to a physical CD.
Booting the Installation CD
Insert the CD into your server and power it up. At the splash screen hit Enter to start the installation. Once the installation finishes, the system will reboot automatically.
The installation will delete all data on all drives connected to the system. REALLY, IT WILL. It will format the hard drive, create its own partitions, and the process will start as soon as you hit Enter. Make sure you know what you are doing!
sipXecs System Configuration Wizard
At the login prompt login as user 'root' using the password you gave when installing your system.
Note: If you need to re-run the configuration wizard for any reason, run sipxecs-setup when logged in as root, but this will result in any previous configuration you have done being lost. Normally this is not needed - most parameters set by the installation wizard can be modified using the Web UI.
The first few screens set some basic system parameters:
- The password for the 'root' (administrator) account. This is needed only to log in to the command shell, which is normally not required - the sipXecs Web UI provides all the management you need. Enter a strong (hard-to-guess) password that you will not forget.
- Network parameters: the fully qualified host name (including the domain, such as
sipxecs.example.com), the IP address, the subnet mask, and the default gateway IP address. The sipXecs services require a stable IP address - while it is possible to manually (not using this Wizard) set up the system to obtain these parameters using DHCP, it must always get the same answer, since some of this information is duplicated in the sipXecs configuration database and will not be changed by a DHCP change.
sipXecs Initial Configuration
If you installed sipXecs using RPMs on an existing system instead of starting from the ISO image, and your system network and other services described above are already configured, you can begin the setup wizard here by running the service setup wizard as the root user from the command line:
sipxecs-setup
First System vs Additional System
sipXecs supports configurations in which the service are distributed on more than one server system. Some services support load-sharing and redundancy, and others can be configured on dedicated servers to provide higher performance or capacity.
The first screen in the sipXecs Initial Configuration Wizard asks whether this is the first sipXecs system you are configuring, or whether this is a system being added to an existing configuration.
Before adding a additional server using this Wizard, you must have configured the new system in the sipXecs Web UI. There are instructions on how to do this in the Web UI (System > Servers).
The following assumes that you are setting up your First system.
SIP Domain
SIP uses addresses that look (and act) much like an email address. Like email addresses, they have two parts separated by an '@' character: a user identifier and a domain name, like this:
sip:user@example.com
The 'user' part of an address may be a phone number, or may be a name like those used in email addresses (some users find it convenient to make a SIP address that is the same as their email address).
The next Wizard screen allows you to select the SIP domain name that is used in the right hand side of your SIP addresses. The domain should match the administrative scope of this system: if this is the sipXecs system for everyone in Example University, then the domain might be example.edu; if this is the sipXecs system for everyone working in the boston office of The Example Corporation, the domain might be boston.example.com. In any case, the name must be one that you can configure the DNS records for.
When configuration is completed, the Wizard starts the sipXecs service and displays a URL you can use to log in to the Web UI (especially following initial configuration, it can take some time for the Web UI to become available - please be patient).
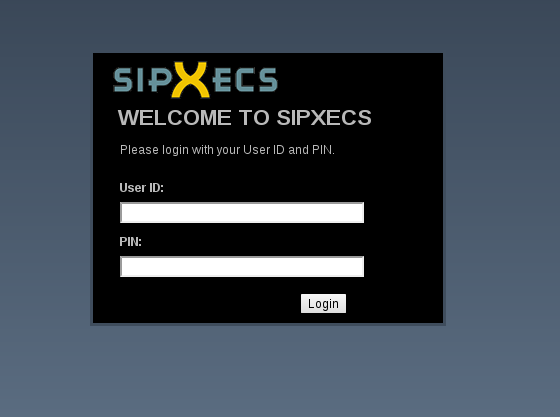
Logging into the sipXecs Configuration Server
Using a computer with network connectivity to the newly installed server, launch a Web browser and go to the URL displayed by the setup wizard (just the hostname of your server).
Enabling services
There are no communications services running after installing. This is a departure from earlier versions and allows for more flexible setups. To enable basic phone calls, login to the Web UI as superadmin and navigate to System > Servers. Next, click on the link for "Telephony Services" and enable the "SIP Registrar" service as the most basic service to enable. You should notice other required services automatically enabling themselves. Click "Apply" button. After 20 seconds or so, your system should be ready for placing basic calls assuming you've added users to your system and are familiar with registering phones for those users.
Managing Processes on the Master and Distributed Servers
After installing a multiple-server system all sipXecs processes on all servers in the cluster can be managed from the Web UI. Login to the Web UI as admin and navigate to System > Servers.
To manage the services on a system, select that system. Services can be monitored, stopped, started or restarted; any change you make to the state of a process is persistent (that is, if you stop a service it will not be started on subsequent system restarts, if you start it then sipXecs will attempt to always run it).
Updating
You should use yum to keep your system updated. This includes sipXecs and any packages that are updated from your distribution. In the unlikely event you have an issue after updating, immediately post an email to sipx-users@list.sipfoundry.org because if there is an issue related to updating there will likely be others in the same situation and information on any forthcoming fixes.
Refer to: Configuration Server
Log Files
The configuration wizard creates a detailed log of all the configuration options chosen during that step. It also logs all the settings of all the different files it writes to configure the system. The log file is at:
/var/log/sipxpbx/sipxagent.log
In addition, during the installation Anaconda created an installation log that can be found in root's home directory. It shows all the packages installed on the system.
/root/install.log
Syslog protocols all the system messages during startup:
/var/log/messages